In a nutshell
- 🧊 Cloudy ice comes from dissolved gases, minerals, and chaotic multi-directional freezing; reduce gases and impurities, then control the freeze for clarity.
- 🔥 Boiling degasses water and can precipitate hardness salts; cool and pour gently, but note that boiling alone won’t guarantee perfectly clear cubes.
- ❄️ Directional freezing is the breakthrough: use an insulated container for top-down freezing, stop at 80–90%, and trim the cloudy layer for crystal-clear results.
- 🧰 Practical workflow: use filtered/boiled water, a descaled kettle, silicone trays, and allow 18–30 hours for large cubes; temper ice briefly to prevent cracking.
- 📦 Smart service: store cubes sealed to avoid odours, rinse to remove frost, and remember UK hard-water realities—boiling enables clarity, controlled freezing delivers perfection.
Clear ice is a quiet luxury. It elevates a whisky, flatters a gin and tonic, and photographs beautifully for menus and social feeds. Yet most home freezers spit out milky cubes. The fix, people say, is simple: boil the water first. There’s truth in that. There’s also myth. As a journalist covering food science and bar craft across the UK, I’ve tested the techniques—from hard London tap to soft Scottish spring water, from kettles furred with limescale to lab-grade distilled. The verdict? Boiling plays a role, but it’s not the whole story. Here’s why boiling helps, when it doesn’t, and the method that guarantees the coveted, crystal-clear ice.
Why Ice Turns Cloudy in the First Place
Cloudiness starts with two villains: dissolved gases and impurities. Tap water holds oxygen, nitrogen, and carbon dioxide in solution. As water freezes from the outside in, these gases get squeezed into the centre. They form tiny bubbles and microfractures that scatter light, turning your cube white and dull. Minerals—calcium and magnesium in particular—add a second layer of haze. Those white streaks you see? Often it’s precipitated hardness salts, familiar to anyone who scrubs kettle limescale in hard-water regions of the UK.
Freezers complicate matters. They freeze fast, often unevenly, and always from every direction at once. The result is turbulent ice formation: chaotic crystal growth, trapped air, stress lines. In short, cloudiness is not a single flaw but a cascade of small, avoidable problems. Understand these mechanics and the path to clarity becomes obvious: reduce gases, reduce impurities, and control the direction and pace of freezing so all the trouble gets pushed away from the part of the ice you plan to serve.
Boiling Water and the Science of Clarity
Boiling helps by degassing. Heated to a rolling boil, water sheds much of its dissolved oxygen and nitrogen, leaving fewer bubbles to form as ice locks into place. It also changes the mineral picture. With vigorous boiling, some hardness can precipitate out and settle. If you then pour gently, leaving sediment behind, you remove a portion of the problem before it hits the tray. Many bartenders swear by a double-boil, though the second round offers diminishing returns. The bigger gain is this: start with boiled water that has cooled, then pour carefully to avoid reintroducing air.
Will boiling alone guarantee transparent cubes? No. It improves clarity but won’t overcome chaotic freezing inside a domestic freezer. For best results, combine boiled, filtered water (a jug filter helps in hard-water areas) with controlled, top-down freezing. One more note for UK kitchens: kettles crusted with limescale can shed flakes into your water as you pour. Descale first, or boil in a clean pan. Use heat-safe silicone trays. Avoid filling cold glass with near-boiling water unless it’s thermal-shock resistant. The science remains simple: fewer gases, fewer particles, calmer ice.
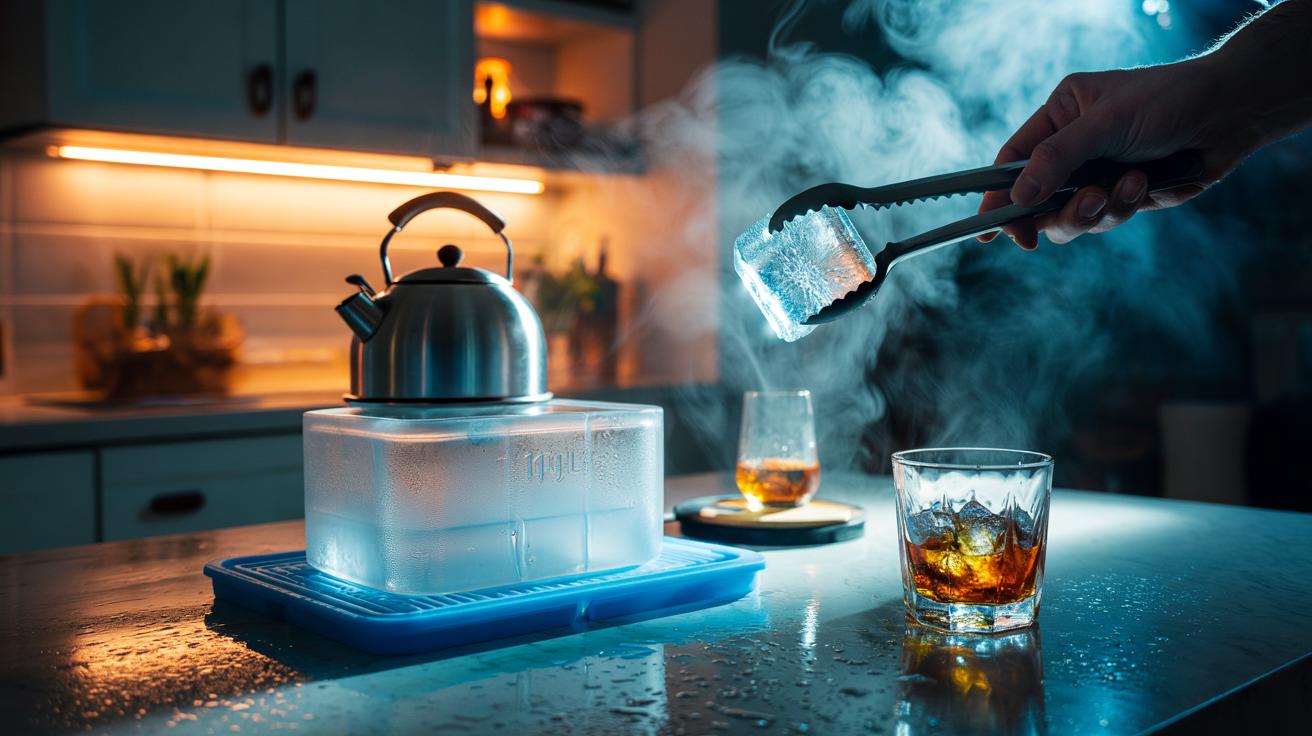
Directional Freezing: The Real Game-Changer
Directional freezing forces ice to form from one side only—usually from the top down—so air and impurities are pushed away from the clear front. That’s how commercial machines make bar-quality cubes. You can mimic this at home with an insulated container (a small cool box or a lidded foam cooler) that fits your tray. Put the tray at the top, leave the lid off to expose the surface, and let the freezer do the rest. The exposed top freezes first; insulated sides and bottom freeze last, channeling the cloudy material downward and out of the cube zone.
Use boiled, cooled water, fill your tray, and set it inside the cooler. Stop the process when about 80–90 percent has frozen—before the cloudy layer reaches the cubes. Trim off the remaining cloudy section with a knife under the tap. Directional freezing, not boiling alone, is what delivers bar-level clarity. If you want spheres or oversized cubes for whisky, freeze a block this way, then cut or press shapes. The difference is immediate and striking: glittering cubes that melt slowly, taste clean, and keep drinks bright.
Tools, Timings, and Troubleshooting
Clear ice is a workflow, not a gadget. Keep it simple: a jug filter, a clean pan or kettle, a silicone tray, and an insulated container. Freeze time varies with cube size and freezer efficiency, but larger cubes (5 cm) often take 18–30 hours to reach the 80–90 percent mark. If your cubes crack, you’re either freezing too fast, using water too hot for the tray, or shocking the ice afterwards. Slow the pace, cool the water to room temperature before pouring, and let finished cubes temper for a minute before hitting them with liquid.
| Factor | What to Do | Why It Helps |
|---|---|---|
| Dissolved gases | Boil, cool, pour gently | Fewer bubbles trapped in ice |
| Minerals | Use filtered or distilled water | Reduces haze from limescale |
| Freezing direction | Insulate sides/bottom; freeze top-down | Pushes impurities away from clear front |
| Speed | Freeze slowly; stop at 80–90% | Prevents cracks and cloudy cores |
Boiling alone will not guarantee perfectly clear ice. Pair it with directional freezing and a filter. Descale kettles in hard-water areas. For cocktail service, store finished cubes in a sealed bag to avoid freezer smells, and rinse briefly before serving to remove frost. The method is repeatable. And satisfying.
Here’s the headline for home mixologists and meticulous hosts alike: boiling water creates the conditions for clarity by removing gases and nudging minerals out, but the flawless finish arrives when you control the freezing direction. With a cooler, a clean tray, and a little patience, you’ll get those jewel-like cubes that make spirits sing and highballs sparkle. The gear is modest, the science sound, the results startling. Ready to try it tonight, or will you experiment with cube size and shape first to tailor melt rate to your favourite drink?
Did you like it?4.7/5 (25)